Showing posts with label girl. Show all posts

Thursday, June 25, 2020

New Design: Little Bunny (Pattern)

2 comments
Wow! I haven't written any blog since 2016! OMG! I almost forgot to update my new designs here! Life is busy as usual but it doesn't stop me to create.....In these past years, I mostly focused on knitting rather than crocheting. I've knitted many beautiful knitwear. If you're interested, please visit my Ravelry account to see them.

During this difficult pandemic time, I have created few crochet designs. One of them is this Little Bunny! I was inspired by a newborn bunny in my backyard one day in early spring, just before Easter! The bunny was so cute who was in brown but also had a patch of white fur near the tail. Therefore I made a pattern of a bunny right away! Hope that everyone is doing well during this difficult time and stay safe and healthy!

You may find this Little Bunny pattern here on Ravelry!


You may find this Little Bunny pattern here on Ravelry


Tuesday, August 11, 2015

Twin Babies Amigurumi (Pattern)

0 comments
Are these twin babies so cute? They are my designs for a cousin who is carrying boy-girl twins. The boy is in a gray color baby jumpsuit with a bear hat! And the girl is wearing a pink dress with a hat of a bunny! They are great gifts for baby showers or kids' birthdays! You may find these patterns on Ravelry and Etsy. These patterns contain many pictures to guide you through how to make both the boy and the girl.


Mini Girls Amigurumi (Pattern)

0 comments
Are these girls cute! I was inspired by my 2 daughters and their friend K - BFF! Each of the girls is wearing a bunny hat, kitty hat and bear hat with a matching color dress with accessories. They are great gifts for any girls or yourself! You may find this pattern on Ravelry or Etsy. This pattern contains many pictures to guide you through how to make all three mini girls and their accessories!


Wednesday, May 13, 2015

Cuite Girls - Cherry (amigurumi)

0 comments
We had beautiful cherry blossom last month in April.  It's so pleasant to see colorful flowers and grass when spring comes!  I made this Cutie Girls series - Cherry for spring. Do you like it?


Friday, May 8, 2015

A Nurse Doll for a Friend (amigurumi)

0 comments
I'm so surprised and sad to hear that a friend of mine got burnt on her chest and neck while she was cooking dinner for her family! While she was cooking, fire caught on her shirt and it burned all the way up to her chin. She got 3rd degree of burning. I feel so sad to hear that! I can only keep her in prayers as well as making this doll to cheer her up. Let her know that God loves her and He's always with her!  By the way, she is a registered nurse that's why this doll is in a nurse uniform!


Monday, March 30, 2015

Cutie Girls - Mocha (amigurumi)

1 comments
I got inspired by a doll from Pinterest and I made up a pattern of it. I named her Mocha because she wears a pretty grey and brown color dress. She is the first doll in my Cutie Girls Series.  The pattern is pretty easy. Hope that you will enjoy making it (Many pictures)!  This pattern is available on ravelry now!


Tuesday, March 3, 2015

Korean Girl in Hanbok (amigurumi pattern)

0 comments
I have to admit that I like Korean culture, not only K-pop or K-drama. I especially like their traditional clothing, Hanbok 한복! Hanbok are always very colorful and elegant! I was inspired and created this Korean girl in Hanbok! 

The top is called Jeogori (저고리) which is removable. The colorful dress is called  chima (치마). Hope that you will like my Korean girl and pattern. You can find the pattern here. I do accept custom orders.


Tuesday, January 6, 2015

Amigurumi Doll - Purple Lollipop

0 comments
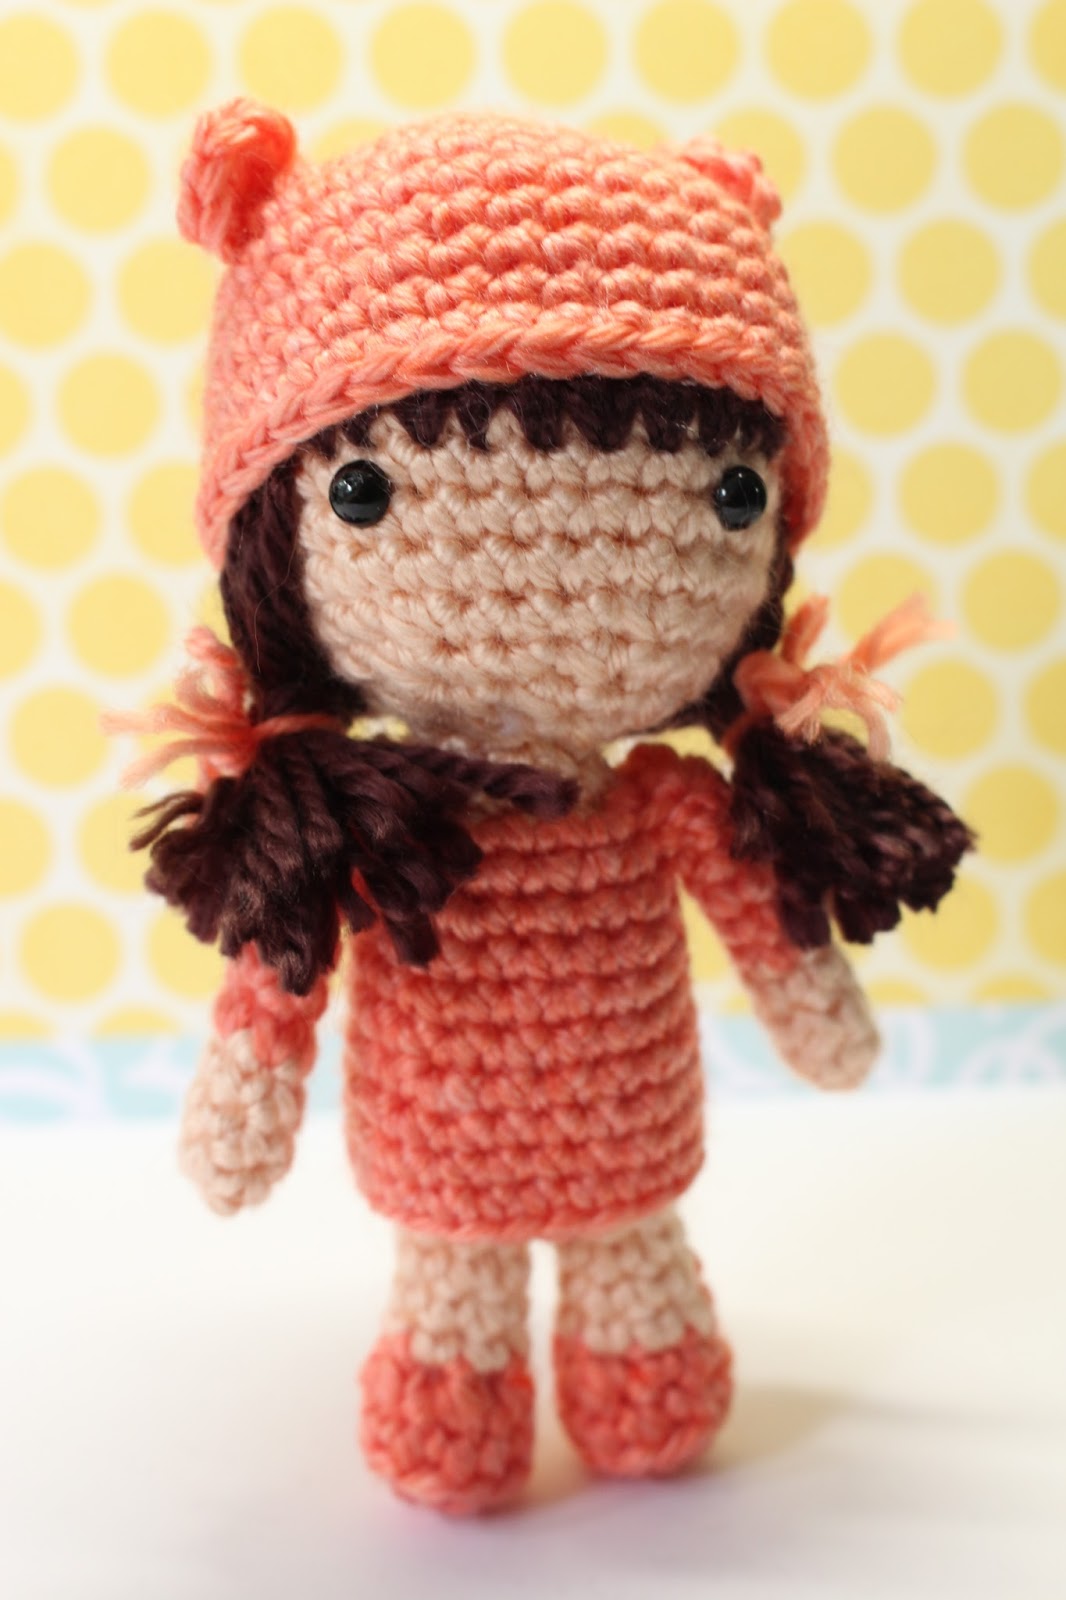
I recently fall in love of making "people" amigurumi.  I started making amigurumi since 6 years ago but only limited in creating "animals" amigurumi. I was so hesitate to make "people" just because I had no confidence to do their hair! Another reason was it's hard to find a natural flesh color like yarn.  Many ami friends suggested few brand and color of yarns online and I found that Caron Simply Soft in Lt Country Peach is the best of all!  

This little doll was made by the Lt Country Peach color yarn. Do you think she looks great?  I made her a simple purple dress and embroidered beads and yarn on the dress.  My daughter loves this doll so much and she names her "Purple Lollipop".  Do you think she is as sweet as a lollipop?


Tuesday, April 30, 2013

Emmy's Baby Cardigan (Free Pattern)

42 comments

Last Wednesday afternoon, my friend invited me to her daughter's 1st birthday party on Saturday!  It was such a rush invitation that I didn't know what gift I should buy for Emmy!  When Emmy was born in last spring, I crocheted a pink dress for her.  It would be so nice to make a cardigan for her this time.  

I was thankful that I have a Bernat Softee Baby yarn at home that I bought it a year or two ago.  It's perfect to make a cardigan!  I found a pattern on Ravelry but the size is for infants to 6 months.  So I changed the hook size and gauge and make it for a 1-year-old.  I also modified the length of the sleeves, the pattern on the neck and crochet technique.  This cardigan is very easy to make and it's done in one day!  Enjoy!


Materials:

Baby yarns (Bernat Softee Baby – Antique White was used in this project)

Size G hook

Yarn needle

A button


Size: 12 months old

Gauge: 18 sts and 8 rows=4”


NOTE: All dcs are worked on back loop only.  Only 3dc-in-next st and 5dc-in-next-st are worked on both loops.


Starting at the neck

Row 1: Chain 72 sts. 1 dc in 4th st from hook, *3 dc in next st, 1 dc in next 4 sts; repeat from* across, ending with 3 dc in next st; 1 dc in last 2 sts. Chain 3, turn.

ROW 2: Skip 2 sts; 1 dc in next st; 5 dc in next st; 1 dc in next 2 sts ; *skip 2 sts, 1 dc in next 2 sts; 5 dc in next st; 1 dc in next 2 sts; repeat from* 12 times. Ch 3, turn.

ROW 3: Skip 2 sts, 1 dc in next 2 sts; 3 dc in next st; 1 dc in next 3 sts; *skip 2 sts; 1 dc in next 3 sts; 3 dc in next st; 1 dc in next 3 sts; repeat from* 12 times. Chain 3, turn.

ROW 4: Skip 2 sts, 1 dc in next 2 sts; 5 dc in next st; 1 dc in next 3 sts; *skip 2 sts; 1 dc in next 3 sts; 5 dc in next st; 1 dc in next 3 sts; repeat from* 12 times. Chain 3, turn.

ROW 5: Skip 2 sts, 1 dc in next 3 sts; 3 dc in next st; 1 dc in next 4 sts; *skip 2 sts; 1 dc in next 4 sts; 3 dc in next st; 1 dc in next 4 sts; repeat from* 12 times. Chain 3, turn.

ROW 6: Skip 2 sts; 1 dc in next 3 sts; 5 dc in next st; 1 dc in next 4 sts; *skip 2 sts; 1 dc in next 4 sts; 5 dc in next st; 1 dc in next 4 sts; repeat from* 12 times. Chain 3, turn.

ROW 7: Skip 2 sts; 1 dc in next 4 sts; 3 dc in next st; 1 dc in next 5 sts; *skip 2 sts, 1 dc in next 5 sts; 3 dc in next st; 1 dc in next 5 sts; repeat from* 12 times. Chain 3, turn.

ROW 8: Skip 2 sts; 1 dc in next 4 sts; 5 dc in next st; 1 dc in next 5 sts; *skip 2 sts; 1 dc in next 5 sts; 5 dc in next st; 1 dc in next 5 sts; repeat from* 12 times. Chain 3, turn.

ROW 9: Skip 2 sts, 1 dc in next 5 sts; 3 dc in next st; 1 dc in next 6 sts; *skip 2 sts; 1 dc in next 6 sts; 3 dc in next st; 1 dc in next 6 sts; repeat from* 12 times. Chain 3, turn.

ROW 10: Skip 2 sts, 1 dc in next 5 sts; 5 dc in next st; 1 dc in next 6 sts; *skip 2 sts; 1 dc in next 6 sts; 5 dc in next st; 1 dc in next 6 sts; repeat from* 12 times. Chain 3, turn.

ROW 11: SEPARATION: Skip 2 sts; 1 dc in next 6 sts; 3 dc in next st; 1 dc in next 7 sts; **skip 2 sts; 1 dc in next 7 sts; 3 dc in next st; 1 dc in next 7 sts **; skip the next 53 dcs (3 patterns) for the sleeve; repeat between ** 4 times for the back; skip the next 53 dcs (3 patterns) for second sleeve; repeat between ** 2 times. Chain 3, turn.

ROW 12: Skip 2 sts; 1 dc in next 6 sts; 5 dc in next st; 1 dc in next 7 sts; *skip 2 sts; 1d c in next 7 sts; 5 dc in next st; 1 dc in next 7 sts; repeat from* across row. Chain 3, turn.

ROW 13: Skip 2 sts, 1 dc in next 7 sts; 3 dc in next st; 1 dc in next 8 sts; *skip 2 sts; 1 dc in next 8 sts; 3 dc in next st; 1 dc in next 8 sts; repeat from* across row. Chain 3, turn.

ROW 14: Skip 2 sts, 1 dc in next 7 sts; 5 dc in next st; 1 dc in next 8 sts; *skip 2 sts; 1 dc in next 8 sts; 5 dc in next st; 1 dc in next 8 sts; repeat from* across row. Chain 3, turn.

ROW 15: Skip 2 sts, 1 dc in next 8 sts; 3 dc in next st; 1 dc in next 9 sts; *skip 2 sts; 1 dc in next 9 sts; 3 dc in next st; 1 dc in next 9 sts; repeat from* across row. Chain 3, turn.

ROW 16: Skip 2 sts, 1 dc in next 8 sts; 5 dc in next st; 1 dc in next 9 sts; *skip 2 sts; 1 dc in next 9 sts; 3 dc in next st; 1 dc in next 9 sts; repeat from* across row. Chain 3, turn.

ROWS 17-19: Skip 2 sts, 1 dc in next 9 sts; 3 dc in next st; 1 dc in next 10 sts; *skip 2 sts; 1 dc in next 10 sts; 3 dc in next st; 1 dc in next 10 sts; repeat from* across row. Chain 3, turn.

ROW 20: Skip 2 sts, 1 dc in next 9 sts; 3 dc in next st; 1 dc in next 10 sts; *skip 2 sts; 1 dc in next 10 sts; 3 dc in next st; 1 dc in next 10 sts; repeat from* across row. DO NOT FASTEN OFF. 


FINISHING

Continue at the lower corner of Right Front.

Ch 1.  2 sc in the corner st.  work sc evenly across Right Front neck.  Ch 4 (to make a button hole). Sl st of the last st.  2 sc in the corner st.  *1 sc in the next st, ch 3, 1 sc in the next st; repeat from * across Neck. 3 sc in the corner st.  work sc evenly across Left Front. 3 sc in the corner st.  1 sc in each st along the bottom of the cardigan ending at the lower corner of Right Front.  Fasten Off.


Sew a button on the upper corner of Left Front.

Tuesday, April 23, 2013

Gifts for a Cousin!

1 comments

We recently took a trip to Hong Kong to visit families there!  I haven't seen my sister and cousins for so many years and I was so glad to know that one of my cousins just got pregnant!  Before we went, I made two beautiful gifts for my cousin and her baby!  One of them was a baby blanket called Ocean Wave (pattern can be found on ravelry.com - free).  I didn't know that she's carrying a boy when I made it, so I picked some colors that should match for both genders! It turns out so perfectly for her baby boy!  Another gift was for my cousin!  She is a die-hard fan of Snoopy! She has all kinds of Snoopy collection!!  But I'm sure she never owns an amigurumi Snoopy!  So I bought this pattern at Etsy.com and made this cutie Snoopy for her!

Best wishes to you and your baby, Carmen!


Tuesday, March 19, 2013

Covered Button Ponytail Holder (Free Tutorial)

0 comments
 I love all kinds of craft since I was young.  I guess I'm inspired by my mom who was so talented especially in sewing and knitting!  She used to sew dresses and knit sweaters for me and my sister when we were young.  When I became a teenager, I started to use a sewing machine to make some little string-pull bags for my stuffs.  Ponytail holders were something I loved to sew.  Now, I become a mother of two pretty daughters. I love to make handmade things for them. These ponytail holders are some of them!  Below is a tutorial video of showing how to make ponytail holders with cover buttons.  For cover button supplies, please visit my shop here.


Agnes Gurumi Copyright © 2012 Design by Ipietoon Blogger Template