Showing posts with label download. Show all posts

Saturday, November 13, 2021

Celtic Weave Bag

0 comments

I haven't updated this blog for a quite while. Life is busy as usual but it doesn't stop me to knit and crochet! 

I created and listed this Celtic Weave Bag Pattern for a while in early spring this year. I designed it for my daughter who always wanted to have a tote bag with texture. So I thought a basket weaving pattern would be perfect! This pattern has plenty of pictures to guide you step by step. Although it’s an advanced crochet stitch that takes a little practice, it’s easy to remember once you get the hang of it.


Today we went to Princeton University for a walk. The weather wasn't too nice, strong wind and rain, but we had a good time walking, talking, and drinking coffee in the campus! 🍁🍂☕


Friday, June 26, 2020

NEW & Updated! MINI Twin Babies Amigurumi (Pattern)

0 comments
Lots of you loved and enjoyed the patterns and designs for my Twin Babies pattern! So...I made another pattern, but this time, they are MINI Twin Babies! Just like the original Twin Babies, the Mini Twin Babies are also as cute and adorable, but easier to make! 

For those of you who are expecting parents or want to make these cute twin babies for family, friends, baby showers, or just for fun, you came to the right place. The Mini Twin Babies Pattern includes a baby boy (teal color) and a baby girl (lavender color) pattern. Each twin baby is 6 inches (15.25cm) in height. To find the patterns, you may go to Ravelry and the pictures will guide you to make the perfect mini twin babies for you, family, friends, and more! 


To purchase the Mini Twin Babies Pattern, please visit Here

Thursday, June 25, 2020

New Design: Little Bunny (Pattern)

2 comments
Wow! I haven't written any blog since 2016! OMG! I almost forgot to update my new designs here! Life is busy as usual but it doesn't stop me to create.....In these past years, I mostly focused on knitting rather than crocheting. I've knitted many beautiful knitwear. If you're interested, please visit my Ravelry account to see them.

During this difficult pandemic time, I have created few crochet designs. One of them is this Little Bunny! I was inspired by a newborn bunny in my backyard one day in early spring, just before Easter! The bunny was so cute who was in brown but also had a patch of white fur near the tail. Therefore I made a pattern of a bunny right away! Hope that everyone is doing well during this difficult time and stay safe and healthy!

You may find this Little Bunny pattern here on Ravelry!


You may find this Little Bunny pattern here on Ravelry


Sunday, July 3, 2016

Sunshine Granny Square Baby Blanket

0 comments
My little nephew was born in May so that I made this sunshine color baby blanket for him!  I chose the DROPS Muskat cotton yarns because it's 100% mercerized cotton. I think it's good for babies. However, it's a little heavy. Cotton yarns are not as light as acrylic yarns!

Anyway, I love the combination of colors - so bright and full of sunshine! You can find this free pattern in my Ravelry shop. Please click HERE for free download!

Enjoy!


Tuesday, August 11, 2015

Twin Babies Amigurumi (Pattern)

0 comments
Are these twin babies so cute? They are my designs for a cousin who is carrying boy-girl twins. The boy is in a gray color baby jumpsuit with a bear hat! And the girl is wearing a pink dress with a hat of a bunny! They are great gifts for baby showers or kids' birthdays! You may find these patterns on Ravelry and Etsy. These patterns contain many pictures to guide you through how to make both the boy and the girl.


Mini Girls Amigurumi (Pattern)

0 comments
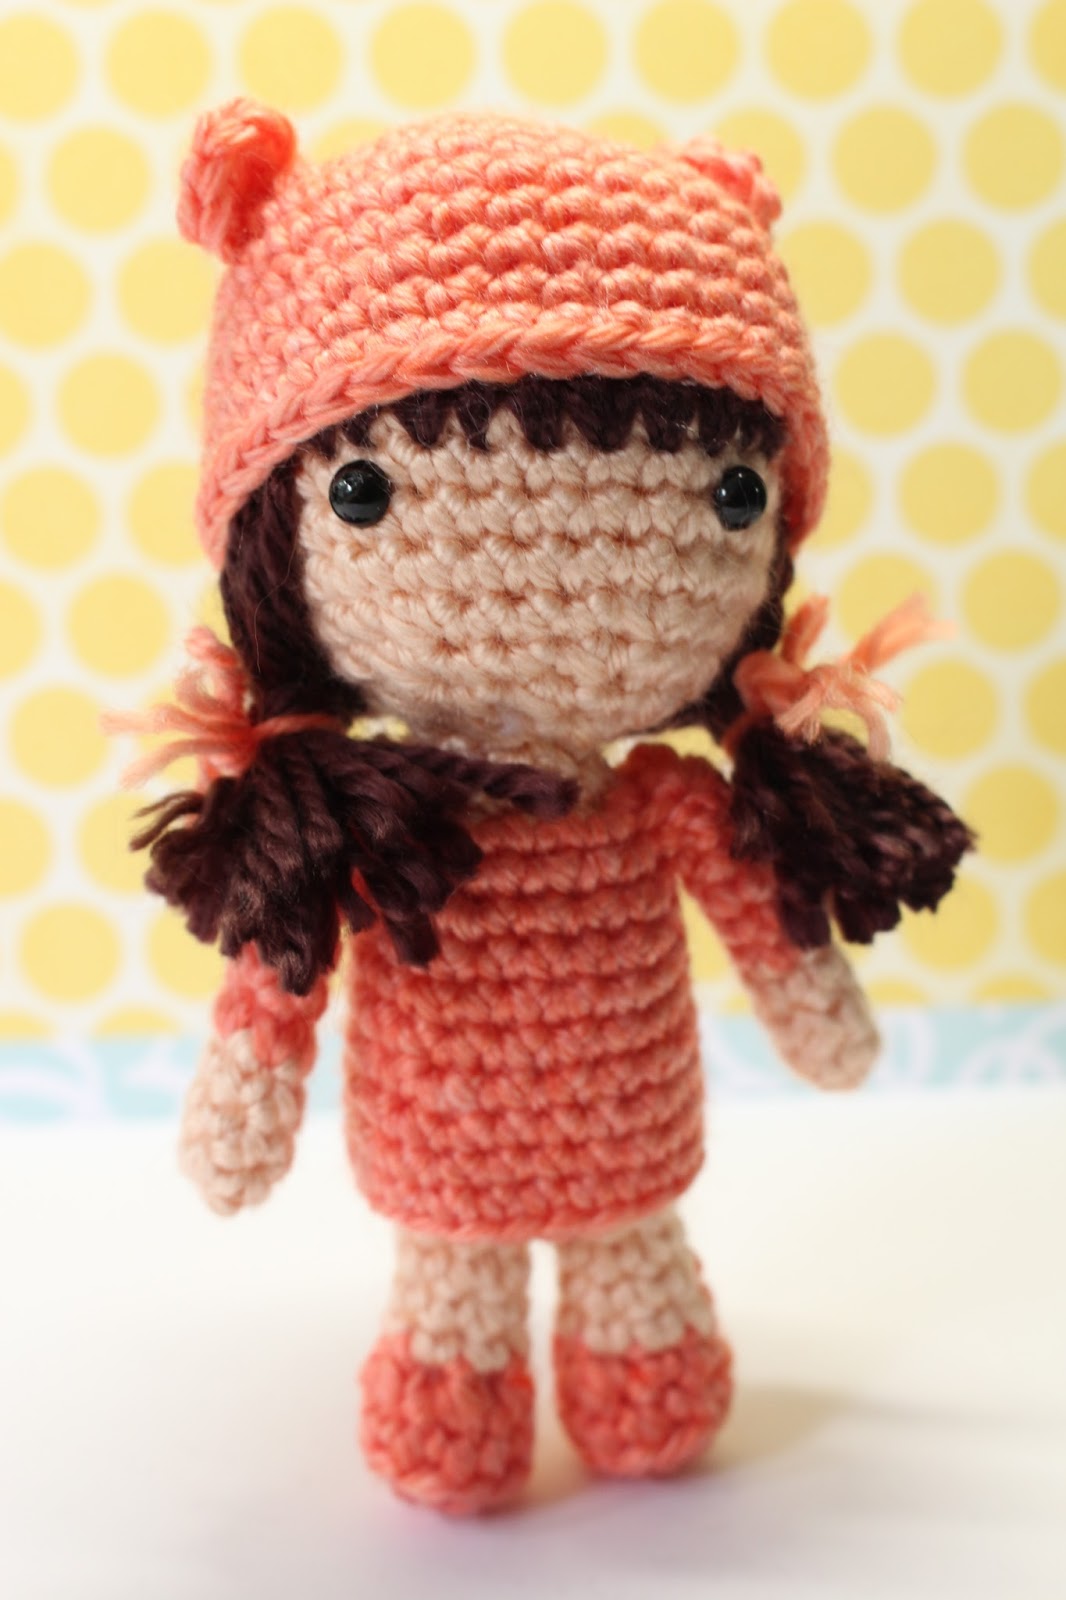
Are these girls cute! I was inspired by my 2 daughters and their friend K - BFF! Each of the girls is wearing a bunny hat, kitty hat and bear hat with a matching color dress with accessories. They are great gifts for any girls or yourself! You may find this pattern on Ravelry or Etsy. This pattern contains many pictures to guide you through how to make all three mini girls and their accessories!


Tuesday, December 23, 2014

Owl Ornament (Free Pattern)

0 comments


These owl are too lovely! I can’t stop making them in different colors!

I made the blue one a little bit bigger. Instead of doing 30sts on the body, I did 36sts and 2 extra rows. 

Those 3 fall color owls are my favorites! I picked up a stick from my backyard and hung them on it. It turns to a beautiful fall decor on my front door! I love it so much!

This pattern is written by Rebecca Homick. You can find her free pattern at Ravelry.


Monday, December 22, 2014

Bunny Katie

0 comments
This little cute bunny is named after a girl's name Katie because it's for her 11th Birthday!  Her pink dress is removable which has a touch of a brown belt. So adorable. This patter is available for purchase on Ravelry.


Thursday, May 2, 2013

Little Lamb (Free Pattern)

0 comments

Someone on Ravelry asked for a pattern of this Little Lamb that I made couple years ago!  Yes, it's really a cute little lamb!  This is one of my daughter's favorite amigurumis! 

I used the Bernat Worsted yarns which are very soft.  It's a good yarn to make ami!  I bought the safety eyes at 6060 which has many sizes of safety eyes and they also hand-paint safety eyes for customers.  You can also download a PDF file on Ravelry! Enjoy!


Little Lamb

Approximately 9” tall


Materials:

Bernat Worsted yarn colors white and dark heather (used in this project)

1 pair of 9mm black safety eyes (www.6060.etsy.com)

Beige color felt

Red and tan color embroidery floss

Yarn needle

Size G hook

Fiberfill


Muzzle

With a beige color felt, cut a circle about 2” in diameter. 

With a red color floss, embroider a nose about 0.25”x 0.125” (6mm x 4mm) on the muzzle.

With a tan color floss, embroider a mouse below the nose as shown in the picture.


Head

With White yarn, Ch 2

Rnd 1: 6sc in the 2nd ch from hook – 6 sts

Rnd 2: 2sc in each st around – 12 sts

Rnd 3: *1sc in next st, 2sc in next st; rep from * around – 18 sts

Rnd 4: *1sc in next 2 sts, 2sc in next st; rep from * around – 24 sts

Rnd 5: *1sc in next 3 sts, 2sc in next st; rep from * around – 30 sts

Rnd 6: *1sc in next 4 sts, 2sc in next st; rep from * around – 36 sts

Rnd 7: *1sc in next 5 sts, 2sc in next st; rep from * around – 42 sts

Rnds 8-16: 1sc in each st around – 42 sts

Rnd 17: *1sc in next 5 sts, sc2tog in next st; rep from * around – 36 sts

Rnd 18: *1sc in next 4 sts, sc2tog in next st; rep from * around – 30 sts

Rnd 19: *1sc in next 3 sts, sc2tog in next st; rep from * around – 24 sts

Rnd 20: 1sc in each st around – 24 sts

With a tan color floss, sew the muzzle on head.

Place safety eyes in place. Stuff as work progresses.

Rnd 21: *1sc in next 2 sts, sc2tog in next st; rep from * around – 18 sts

Rnd 22: *1sc in next st, sc2tog in next st; rep from * around – 12 sts

Stuff head firmly

Rnd 23: sc2tog 6 times around – 6 sts

Fasten Off.


Ears (make 2)

With Dark Heather yarn

Ch 2

Rnd 1: 6sc in 2nd ch from hook

Rnd 2: 2sc in each st around – 12 sts

Rnds 3-6: 1sc in each st around – 12 sts

Fasten Off.  Leave a long tail for sewing.  Sew open end together and sew to head


Body

With White yarn

Ch 2

Rnd 1: 6sc in 2nd ch from hook

Rnd 2: 2sc in each st around – 12 sts

Rnd 3: *1sc in next st, 2sc in next st; rep from * around – 18 sts

Rnd 4: *1sc in next 2 sts, 2sc in next st; rep from * around – 24 sts

Rnd 5: *1sc in next 3 sts, 2sc in next st; rep from * around – 30sts

Rnds 6-13: 1sc in each st around – 30 sts

Stuff fiberfill as work progresses

Rnd 14: *1sc in next 3 sts, sc2tog in next st; rep from * around – 24 sts

Rnd 15: *1sc in next 2 sts, sc2tog in next st; rep from * around – 18 sts

Rnd 16: *1sc in next st, sc2tog in next st; rep from * around – 12 sts

Fasten Off.  Leave a long tail to sew on Head


Arms (Make 2)

With Dark Heather yarn

Ch 2

Rnd 1: 4sc in 2nd ch from hook

Rnd 2: 2sc in each st around – 8 sts

Rnds 3-9: 1sc in each st around – 8 sts

Stuff fiberfill

Rnd 10: *sc2tog; rep * around – 4 sts

Rnd 11: sc2tog 2 times – 2 sts

Fasten Off.  Leave a long tail and sew on Body


Legs (Make 2)

With Dark Heather yarn

Ch 2

Rnd 1: 6sc in 2nd ch from hook

Rnd 2: 2sc in each st around – 12 sts

Rnds 3-11: 1sc in each st around – 12 sts

Stuff fiberfill

Rnd 12: *sc2tog; rep * around – 6 sts

Rnd 13: *sc2tog; rep * around – 3 sts

Fasten Off.  Leave a long tail and sew on Body

Tuesday, April 30, 2013

Emmy's Baby Cardigan (Free Pattern)

42 comments

Last Wednesday afternoon, my friend invited me to her daughter's 1st birthday party on Saturday!  It was such a rush invitation that I didn't know what gift I should buy for Emmy!  When Emmy was born in last spring, I crocheted a pink dress for her.  It would be so nice to make a cardigan for her this time.  

I was thankful that I have a Bernat Softee Baby yarn at home that I bought it a year or two ago.  It's perfect to make a cardigan!  I found a pattern on Ravelry but the size is for infants to 6 months.  So I changed the hook size and gauge and make it for a 1-year-old.  I also modified the length of the sleeves, the pattern on the neck and crochet technique.  This cardigan is very easy to make and it's done in one day!  Enjoy!


Materials:

Baby yarns (Bernat Softee Baby – Antique White was used in this project)

Size G hook

Yarn needle

A button


Size: 12 months old

Gauge: 18 sts and 8 rows=4”


NOTE: All dcs are worked on back loop only.  Only 3dc-in-next st and 5dc-in-next-st are worked on both loops.


Starting at the neck

Row 1: Chain 72 sts. 1 dc in 4th st from hook, *3 dc in next st, 1 dc in next 4 sts; repeat from* across, ending with 3 dc in next st; 1 dc in last 2 sts. Chain 3, turn.

ROW 2: Skip 2 sts; 1 dc in next st; 5 dc in next st; 1 dc in next 2 sts ; *skip 2 sts, 1 dc in next 2 sts; 5 dc in next st; 1 dc in next 2 sts; repeat from* 12 times. Ch 3, turn.

ROW 3: Skip 2 sts, 1 dc in next 2 sts; 3 dc in next st; 1 dc in next 3 sts; *skip 2 sts; 1 dc in next 3 sts; 3 dc in next st; 1 dc in next 3 sts; repeat from* 12 times. Chain 3, turn.

ROW 4: Skip 2 sts, 1 dc in next 2 sts; 5 dc in next st; 1 dc in next 3 sts; *skip 2 sts; 1 dc in next 3 sts; 5 dc in next st; 1 dc in next 3 sts; repeat from* 12 times. Chain 3, turn.

ROW 5: Skip 2 sts, 1 dc in next 3 sts; 3 dc in next st; 1 dc in next 4 sts; *skip 2 sts; 1 dc in next 4 sts; 3 dc in next st; 1 dc in next 4 sts; repeat from* 12 times. Chain 3, turn.

ROW 6: Skip 2 sts; 1 dc in next 3 sts; 5 dc in next st; 1 dc in next 4 sts; *skip 2 sts; 1 dc in next 4 sts; 5 dc in next st; 1 dc in next 4 sts; repeat from* 12 times. Chain 3, turn.

ROW 7: Skip 2 sts; 1 dc in next 4 sts; 3 dc in next st; 1 dc in next 5 sts; *skip 2 sts, 1 dc in next 5 sts; 3 dc in next st; 1 dc in next 5 sts; repeat from* 12 times. Chain 3, turn.

ROW 8: Skip 2 sts; 1 dc in next 4 sts; 5 dc in next st; 1 dc in next 5 sts; *skip 2 sts; 1 dc in next 5 sts; 5 dc in next st; 1 dc in next 5 sts; repeat from* 12 times. Chain 3, turn.

ROW 9: Skip 2 sts, 1 dc in next 5 sts; 3 dc in next st; 1 dc in next 6 sts; *skip 2 sts; 1 dc in next 6 sts; 3 dc in next st; 1 dc in next 6 sts; repeat from* 12 times. Chain 3, turn.

ROW 10: Skip 2 sts, 1 dc in next 5 sts; 5 dc in next st; 1 dc in next 6 sts; *skip 2 sts; 1 dc in next 6 sts; 5 dc in next st; 1 dc in next 6 sts; repeat from* 12 times. Chain 3, turn.

ROW 11: SEPARATION: Skip 2 sts; 1 dc in next 6 sts; 3 dc in next st; 1 dc in next 7 sts; **skip 2 sts; 1 dc in next 7 sts; 3 dc in next st; 1 dc in next 7 sts **; skip the next 53 dcs (3 patterns) for the sleeve; repeat between ** 4 times for the back; skip the next 53 dcs (3 patterns) for second sleeve; repeat between ** 2 times. Chain 3, turn.

ROW 12: Skip 2 sts; 1 dc in next 6 sts; 5 dc in next st; 1 dc in next 7 sts; *skip 2 sts; 1d c in next 7 sts; 5 dc in next st; 1 dc in next 7 sts; repeat from* across row. Chain 3, turn.

ROW 13: Skip 2 sts, 1 dc in next 7 sts; 3 dc in next st; 1 dc in next 8 sts; *skip 2 sts; 1 dc in next 8 sts; 3 dc in next st; 1 dc in next 8 sts; repeat from* across row. Chain 3, turn.

ROW 14: Skip 2 sts, 1 dc in next 7 sts; 5 dc in next st; 1 dc in next 8 sts; *skip 2 sts; 1 dc in next 8 sts; 5 dc in next st; 1 dc in next 8 sts; repeat from* across row. Chain 3, turn.

ROW 15: Skip 2 sts, 1 dc in next 8 sts; 3 dc in next st; 1 dc in next 9 sts; *skip 2 sts; 1 dc in next 9 sts; 3 dc in next st; 1 dc in next 9 sts; repeat from* across row. Chain 3, turn.

ROW 16: Skip 2 sts, 1 dc in next 8 sts; 5 dc in next st; 1 dc in next 9 sts; *skip 2 sts; 1 dc in next 9 sts; 3 dc in next st; 1 dc in next 9 sts; repeat from* across row. Chain 3, turn.

ROWS 17-19: Skip 2 sts, 1 dc in next 9 sts; 3 dc in next st; 1 dc in next 10 sts; *skip 2 sts; 1 dc in next 10 sts; 3 dc in next st; 1 dc in next 10 sts; repeat from* across row. Chain 3, turn.

ROW 20: Skip 2 sts, 1 dc in next 9 sts; 3 dc in next st; 1 dc in next 10 sts; *skip 2 sts; 1 dc in next 10 sts; 3 dc in next st; 1 dc in next 10 sts; repeat from* across row. DO NOT FASTEN OFF. 


FINISHING

Continue at the lower corner of Right Front.

Ch 1.  2 sc in the corner st.  work sc evenly across Right Front neck.  Ch 4 (to make a button hole). Sl st of the last st.  2 sc in the corner st.  *1 sc in the next st, ch 3, 1 sc in the next st; repeat from * across Neck. 3 sc in the corner st.  work sc evenly across Left Front. 3 sc in the corner st.  1 sc in each st along the bottom of the cardigan ending at the lower corner of Right Front.  Fasten Off.


Sew a button on the upper corner of Left Front.
 

Agnes Gurumi Copyright © 2012 Design by Ipietoon Blogger Template